RBMTX-Lite OpenWrt SDK Exmaple: Różnice pomiędzy wersjami
Z Elproma Wiki Knowledge Base
| (Nie pokazano 3 wersji utworzonych przez 3 użytkowników) | |||
| Linia 15: | Linia 15: | ||
tar -xf ~/Downloads/rbmtx3-owrt-sdk-....Linux-x86_64.tar.xz | tar -xf ~/Downloads/rbmtx3-owrt-sdk-....Linux-x86_64.tar.xz | ||
#<li value="3"> Go to the SDK directory. | #<li value="3"> Go to the SDK directory. | ||
cd rbmtx3-owrt-sdk- | cd rbmtx3-owrt-sdk-.....Linux-x86_64/ | ||
#<li value="4"> Update the feeds. | #<li value="4"> Update the feeds. | ||
./scripts/feeds update -a | ./scripts/feeds update -a | ||
| Linia 54: | Linia 54: | ||
</li> | </li> | ||
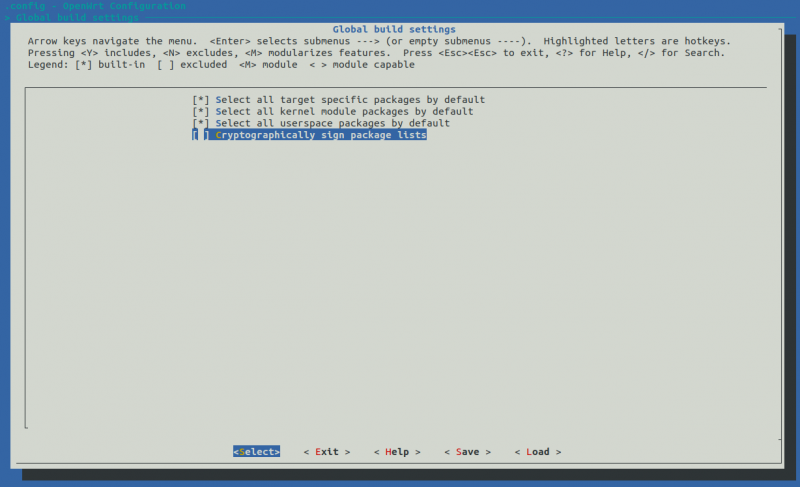
<li>Then turn off the ''' Cryptographically sign package lists''' option in the '''Global build settings''' | <li>Then turn off the ''' Cryptographically sign package lists''' option in the '''Global build settings''' | ||
<br> | |||
[[Plik:Turn_off_cryptograpy.png |800px|border|class=tlt-border]] | [[Plik:Turn_off_cryptograpy.png |800px|border|class=tlt-border]] | ||
<br> | |||
</li> | </li> | ||
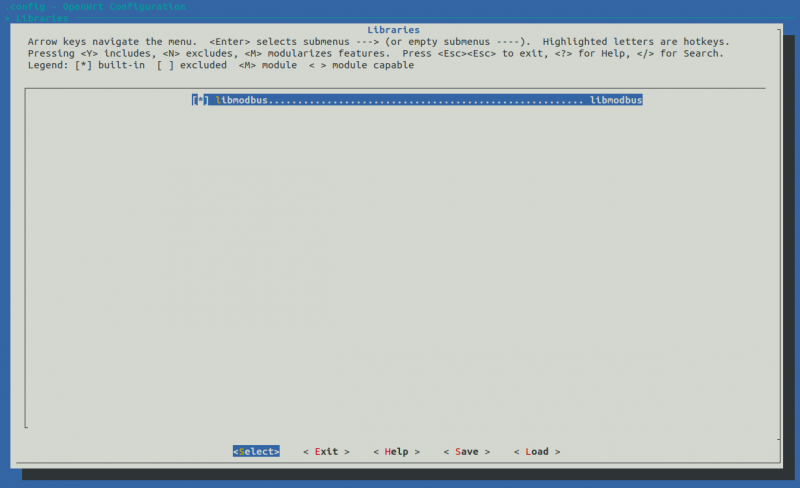
<li> Then go to the '''Libraries''' section and make sure the libraries you want to use are checked. | <li> Then go to the '''Libraries''' section and make sure the libraries you want to use are checked. | ||
<br> | |||
[[Plik:RBMTX-Lite Libraries.png|800px|border|class=tlt-border]] | [[Plik:RBMTX-Lite Libraries.png|800px|border|class=tlt-border]] | ||
<br> | |||
</li> | </li> | ||
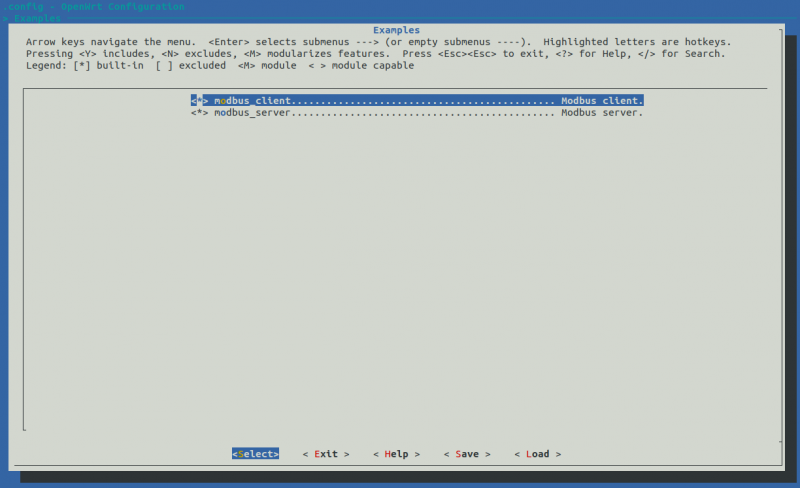
<li>Next, go to the section where you placed the package to compilation. The name of section depends on the name that was placed in the '''CATEGORY:''' option in the package's Makefile. In our case it is '''Example''' section. Make sure your custom package is checked. | <li>Next, go to the section where you placed the package to compilation. The name of section depends on the name that was placed in the '''CATEGORY:''' option in the package's Makefile. In our case it is '''Example''' section. Make sure your custom package is checked. | ||
<br> | |||
[[Plik:RBMTX-Lite Cutom Package.png|800px|border|class=tlt-border]] | [[Plik:RBMTX-Lite Cutom Package.png|800px|border|class=tlt-border]] | ||
<br> | |||
</li> | </li> | ||
<li>At the end, save all settings - leave the default name of the configuration. </li> | <li>At the end, save all settings - leave the default name of the configuration. </li> | ||
| Linia 72: | Linia 72: | ||
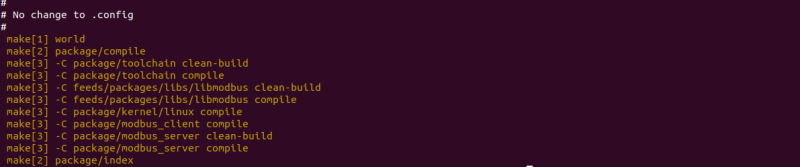
<li>Now, we are ready to compile our custom package. Type command '''make''' in the terminal and wait for compilation to finish. | <li>Now, we are ready to compile our custom package. Type command '''make''' in the terminal and wait for compilation to finish. | ||
You should see the output like the one below: | You should see the output like the one below: | ||
<br> | |||
[[Plik:RBMTX-Lite Compilation Output.png|800px|border|class=tlt-border]] | [[Plik:RBMTX-Lite Compilation Output.png|800px|border|class=tlt-border]] | ||
<br> | |||
</li> | </li> | ||
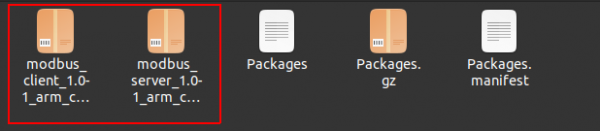
<li>Once the compilation process is complete, the package can be found in the '''bin/packages/arm_cortex-a7_neon/base''' directory. | <li>Once the compilation process is complete, the package can be found in the '''bin/packages/arm_cortex-a7_neon/base''' directory. | ||
<pre>cd bin/packages/arm_cortex-a7_neon/base</pre> | <pre>cd bin/packages/arm_cortex-a7_neon/base</pre> | ||
<br> | |||
[[Plik:RBMTX-Lite Packages.png|600px | [[Plik:RBMTX-Lite Packages.png|600px|border|class=tlt-border]] | ||
<br> | |||
</li> | </li> | ||
</ol> | </ol> | ||
[[Category:RBMTX-Lite]] | [[Category:RBMTX-Lite]] | ||
Aktualna wersja na dzień 16:09, 27 kwi 2023
Prerequisites
You will need:
- A PC, laptop or virtual machine running Linux OS (preferably Debian/Ubuntu distro)
- An SDK intended for your router, which can be downloaded here: Software Development Kit
Preparation
- Create a directory where the SDK will be extracted, e.g. RBMTX_SDK.
- Open a terminal in the folder you created and unzip the SDK.
tar -xf ~/Downloads/rbmtx3-owrt-sdk-....Linux-x86_64.tar.xz
- Go to the SDK directory.
cd rbmtx3-owrt-sdk-.....Linux-x86_64/
- Update the feeds.
./scripts/feeds update -a
Compiling a custom package
In this example, we are going to show you how to generate OpenWrt package based on the simple Modbus client and server application.
- Install dependency library (in this example, it is libmodbus). To install library run:
./scripts/feeds install libmodbus
- To create your custom package, when you are in the SDK directory go to the package directory.
cd package
- Make a new directory where the package Makefile should be placed.
 mkdir modbus_server
 cd modbus_server
-
Create the Makefile file to build your custom package. Example Makefile is shown below.
- It is important to change all modbus_server strings with your package name.
- In the SOURCE_DIR section add path to your package sources.
- If you are using external library, it is important to complete the dependency sections e.g.:
TARGET_LDFLAGS=-lmodbus
DEPENDS:= +libmodbus
PKG_BUILD_DEPENDS+= libs/libmodbus

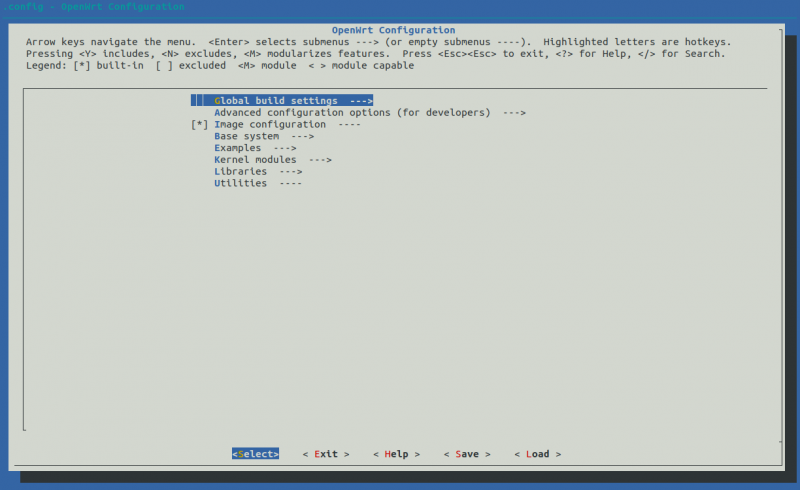
- Now we are ready to select the packages and libraries which we want to compile. Return to the SDK root directory and execute the command:
make menuconfig
You should see a view like the one below.
- Then turn off the Cryptographically sign package lists option in the Global build settings
- Then go to the Libraries section and make sure the libraries you want to use are checked.
- Next, go to the section where you placed the package to compilation. The name of section depends on the name that was placed in the CATEGORY: option in the package's Makefile. In our case it is Example section. Make sure your custom package is checked.
- At the end, save all settings - leave the default name of the configuration.
- Exit the menuconfig.
- Now, we are ready to compile our custom package. Type command make in the terminal and wait for compilation to finish.
You should see the output like the one below:
- Once the compilation process is complete, the package can be found in the bin/packages/arm_cortex-a7_neon/base directory.
cd bin/packages/arm_cortex-a7_neon/base